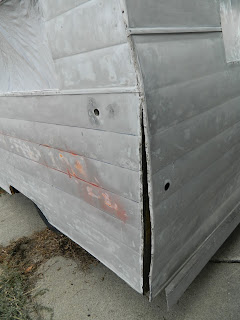
I can testify: Until you've done it, the idea of taking your vintage trailer apart for rot repair is daunting (use this link to go to Rot Repair 101, the earlier post on disassembly).
This is my 1965 Shasta compact, which sat under cover for 6 years until I learned the take-apart process with another trailer.
Thanks to my guinea-pig trailer, which turned out great, I lost my fear of removing pieces of a trailer, and also learned that the simple construction of a small vintage trailer makes it less complicated to fix than I'd feared.
Shastas have a reputation for rotting at the rear corners, and mine was no exception. Water had gotten in over time after the original seals got old and disintegrated. Because water always flows downhill, the moisture migrated to the 50-year-old rear corners, rotting them.
This is the right-rear corner. It was so soft from rot that I could pull it apart with a fingertip.
This is the same piece of the framing, higher up. The rot extended up about another foot, and went sideways into some horizontal framing pieces. The corresponding large frame piece on the other side was almost as bad. (Note the darker brown wood that's under the insulation--that's the backside of the interior paneling.)
The old frame pieces, before they were removed up to the point of healthy wood, were used as patterns to make new ones. Each one was custom-cut from a 1x6 piece of new lumber.
During the pattern process, places for wiring holes were marked and drilled. The pieces weren't fastened on until the holes were done.
Each new side piece was sprayed on its back side with a fast-set wood glue. Then it was butted up beneath what remained after the rotted section was removed.
Here's the curb-side section, set into place.
Next, the rotted 1x2 frame pieces were replaced. (They were removed before the side pieces went on.)
These pieces provide structural support, as well as surface area for nailing and connecting the side pieces.
Here is a completed rear corner. (You'll note some discolored old wood; it was allowed to remain as it wasn't rotten.)
And, here's the completed rear-end rot repair job, ready for new insulation to be added before the skin goes back on.
Cost: About $40 in lumber, and $20 for each 4x8 section of foam board insulation. As long as the skin was lifted, I went ahead and replaced as much old insulation as possible, all the way around.
We put the skins back on, then painted the trailer, and reinstalled the windows, door, vents, J-rail, and other trim with new butyl tape and edge sealant.
The finished product:


