Sunday, February 1, 2015
Common Source of Trailer Leaks: Exterior Running Lights
See those light fixtures at the top edge of this vintage trailer? Those are its running lights--red in back, yellow in front--and they are a commonly overlooked source of leaks.
In fact, if you're experiencing corner or window leaks, there's a good chance that your roof and windows aren't where the water is getting in.
Trailer anatomy lesson:
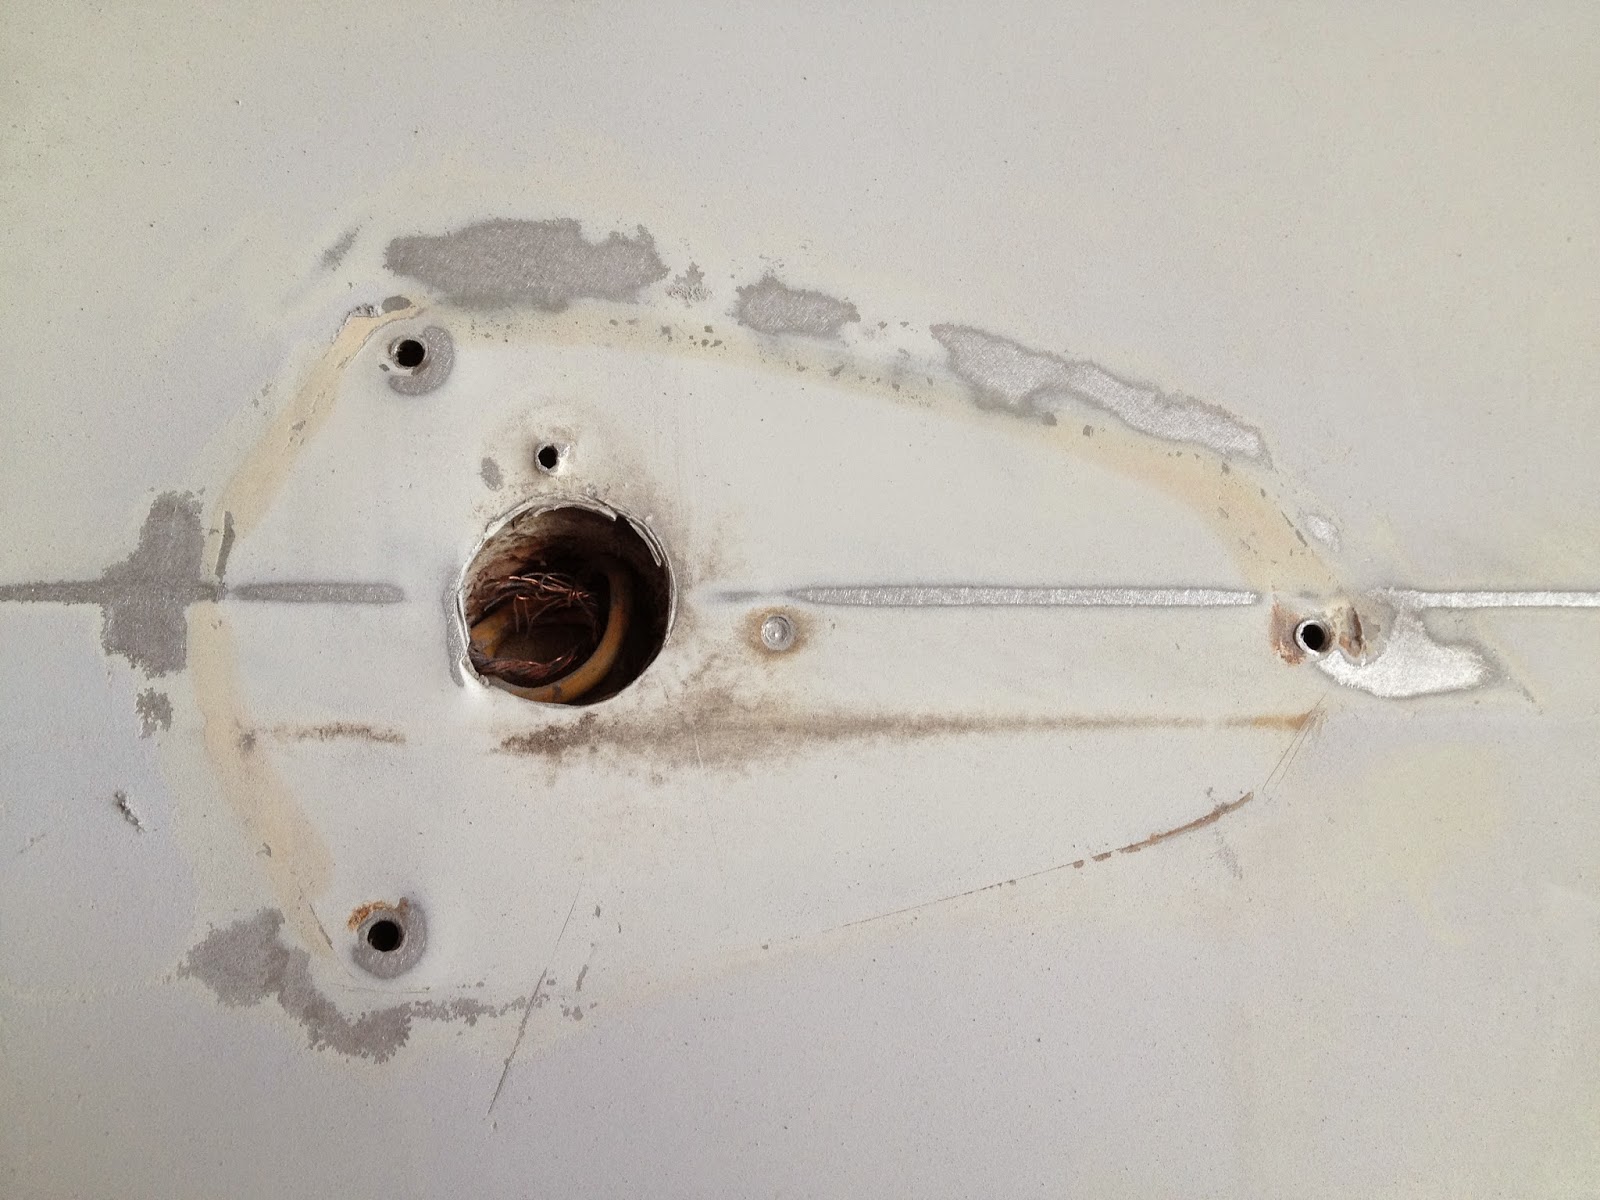
In order for its bulb to light up when you plug in to your tow vehicle, each trailer running light sets over a hole that's been drilled through the skin, for sake of the wiring. The fixture above, from a 1961 Aloha, has been removed during the repainting process; the hole is the size of a dime.
This fixture is on the driver-side rear corner of the trailer in photo 1. A man's finger could easily fit through the hole, and the trailer has12 of these holes for its 12 electric running lights. That's 12 places for water to get in.
The reason this light is pulled away from the trailer is because its protective sealing had dried out from old age, allowing the fixture to come loose. Basically, the trailer had an open wound that would allow water to get in with little trouble.
And the thing to remember about water is….
It always finds a way to run downhill. Which means it'll be behind your trailer's walls in no time.
What to do:
* Get a ladder out and inspect each light, looking for cracks or gaps in the seal between the fixture and the trailer skin. Grab the fixture and try to wiggle it--if it's loose enough to move, it's loose enough for water to get in.
* Check for burned-out bulbs. Plug the trailer into your tow rig, turn the lights on, and make note of any running lights that won't come on. You might as well replace them and make sure a fixture still works, before you reseal something that won't work even with a new bulb.
* If all you find is a minor crack or hole in the seal behind a fixture, a bead of RV sealant, such as TremPro 635, may be all you need.
* Plan to a full reseal job on any fixture that's loose, broken, or with a fully defunct seal.
* You'll need to pull it away from the trailer and clean the trailer surface plus backside of the fixture. (I used brake-cleaning fluid, followed by a wipe of TSP to remove any solvent residue). Apply trailer-seal putty tape to the trailer skin, set the fixture firmly back in place, and trim away excess that's squeezed out. Apply a bead of RV sealant over the top, as extra moisture insurance.
* An RV repair shop can do this for you, of course. But it's not hard to do by yourself, and will help your trailer last for more years to come.
Subscribe to:
Post Comments (Atom)


I don't have a trailer or RV any more, but I remember being plagued with leaks now and then.
ReplyDeleteThis comment has been removed by a blog administrator.
ReplyDeleteThis comment has been removed by a blog administrator.
ReplyDeleteWhat do you do when the bulb needs changing?
ReplyDeleteAnd can I switch out my regular bulbs with led bulbs....without a degree in electrical engineering? ;-)
DeleteAnd can I switch out my regular bulbs with led bulbs....without a degree in electrical engineering? ;-)
DeleteWhat do you do when the bulb needs changing?
ReplyDeleteWhat do you do when you need to replace the bulbs? Also, can I simply change out existing regular bulbs to led without a degree in electrical engineering? ;-)
ReplyDeleteWhat do you do when you need to replace the bulbs? Also, can I simply change out existing regular bulbs to led without a degree in electrical engineering? ;-)
ReplyDeleteAs someone who loves camping, I sometimes find it hard to take care of my trailer. Yet, there are lots of easy ways to fix any trouble, including trailer leaks. It may seem hard to do, but it's easy to do with a little time, patience, sealant, and the right tools. I will definitely store these tips in my mind for the future. Thanks!
ReplyDeleteThis comment has been removed by a blog administrator.
ReplyDelete