Pages

Thursday, February 26, 2015

Girl Camping Girls--Reunited!


Just because the calendar still says 'Winter' doesn't mean we're willing to wait months and months before we can get together and enjoy using our little camping palaces.

Proof: Last weekend, eight Girl Camping Girls thumbed their noses at the calendar and the thermometer with a 'pre-camp' visit to Swiftwater RV Park in White Bird, Idaho. A cold front descended and took away the sunshine, which only allowed us to enjoy a warm fire that much more.

Play time! Early-spring time! A chance to test the equipment and the keep-warm skills!


This area is one of Idaho's banana belts, with hints of spring coming much earlier than in most other parts of the Inland Northwest. We soaked up the sight of 'new green,' from the shoots coming up to the fresh baby leaves on the trees. Some gals saw blossoming fruit trees as they drove down the Salmon River Canyon from Riggins. It sounds like spring here, too. Canadian geese seem to use the Salmon River as a flyway, honking as they cruise the river channel in a northerly direction.


It's always so great to see each other again after the holiday season…here we have Miss Mig and Miss Sherry, in a happy reunion.


After many months of only being able to think about the sight of vintage trailers, it's just plain delightful to be able to walk among them again. Even though they were factory-produced, no two are ever alike at this point in their lives. I'm endlessly engaged by their designs and differences.


One friend came rolling in with this vintage Winnebavo Brave motorhome--my first to see in person. I wasn't able to step back back enough to get a silhouette shot, but trust me, the retro styling on this vehicle is wow-worthy. When it goes down the road, you can't take your eyes off it.


For meals, we took turns providing main dishes and extras, with individual contributions to a community bar. Ditto on the decorations: They're a form of art-on-the-fly, with one person fetching this and another going for that as the whole scene evolves.


Friends at the campfire circle--in itself, one of the very best reasons to go camping, if you ask me!


Monday, February 9, 2015

Analyze This Vintage Trailer


Here's an old travel trailer I spotted while out on a Sunday drive. All I got was this one photo. Let's use it to analyze the trailer's condition based on what's readily visible.

The task: Get clues to what's missing, what needs fixing, and where deeper problems may lurk. Use your critical eyes.

What do you see? What does it tell you, or make you wonder about?


Tuesday, February 3, 2015

Vintage-Trailer Shopping: No. 1 Tip For Keeping Your Head


You've searched and searched, maybe for months, and all of a sudden, there it is--the vintage travel trailer of your obsessive dreams, for sale at a price you can afford. And OMG, you're even the first in line to get to see it, which means it's as good as yours!! You cannot wait to step inside and see what it's really like…so excited you could burst!

This is a thrilling yet also critical moment in your search for a vintage trailer. Why? Because you can't think clearly and objectively when 'thrill of the find' takes over. (Just ask any savvy car salesman, who knows he's gotcha when this happens.)

If you find yourself mentally decorating the trailer before you've talked to the owner or actually seen it in person, you're already in danger of driving home with a box of Buyer's Remorse on wheels. Add the big urge for the hunt to be over, finally, and your ability to be objective doesn't have a snowball's chance.

Here's my No. 1 tip for keeping control of both your head and your cash in this situation:

Don't go inside the trailer until you've spent at least 20 minutes going over the outside.

This, in and of itself, takes enormous control. Because of course you're dying to see the inside. But I'll let you in on a little secret: The seller is dying for you to step inside immediately, too, because that's where you're most likely to fall in love with the trailer's charm or potential for it. That's what he's going to sell you on.

Trouble is, that's not all you would be buying.

The overall condition of a trailer's exterior is telltale of the care it's had and what you might face in trying to fix serious issues. You don't have to be an expert to use that 20 minutes actively. Just use your critical eyes--looking not for what there is to like, but for what there is to fix. (Read: What there is that will cost you money and time.)

Even if you don't know what it is or whether it's sound, go over every element on every exterior surface. Take notes and pictures--acts that require objective thinking to perform. And unless you have a direct question, let the seller do the talking. The longer you take in going over the exterior, the more anxious he's likely to get, and the more information he'll probably divulge about the trailer and what's been done (or not done) to it. At this point, bargaining power begins to tip in your direction.

Here are a few exterior photos that illustrate what your 20-minute exterior time can reveal:


* Duct tape over the top of a window, in place of missing metal rain-gutter trim. Most likely leaking.


* Old leak-repair caulking, several layers; hole in the skin above a seam; gunk inside electric running light cover; definitely leaking.


* Torn metal skin and exposed wooden framing. Easy way for moisture to enter, rot to be suspected.

The point of this post isn't to show you every single thing to look at on a vintage trailer, but to help you stay clear-eyed.

This part of your look-see may be all it takes for you to know that a particular trailer isn't for you after all. If you can live with the issues, they'll give you something to weigh against your findings once you step inside. If you find nothing of concern, woohoo--now you might have a purchase candidate.

Try my advice about staying outside upon initial meeting of a trailer. It's a little bit like dating the prince for a while before you let him kiss you and sweep you off your feet. A short delay at the start can keep you from needing a messy divorce later on.


Sunday, February 1, 2015

Common Source of Trailer Leaks: Exterior Running Lights


See those light fixtures at the top edge of this vintage trailer? Those are its running lights--red in back, yellow in front--and they are a commonly overlooked source of leaks.

In fact, if you're experiencing corner or window leaks, there's a good chance that your roof and windows aren't where the water is getting in.

Trailer anatomy lesson:


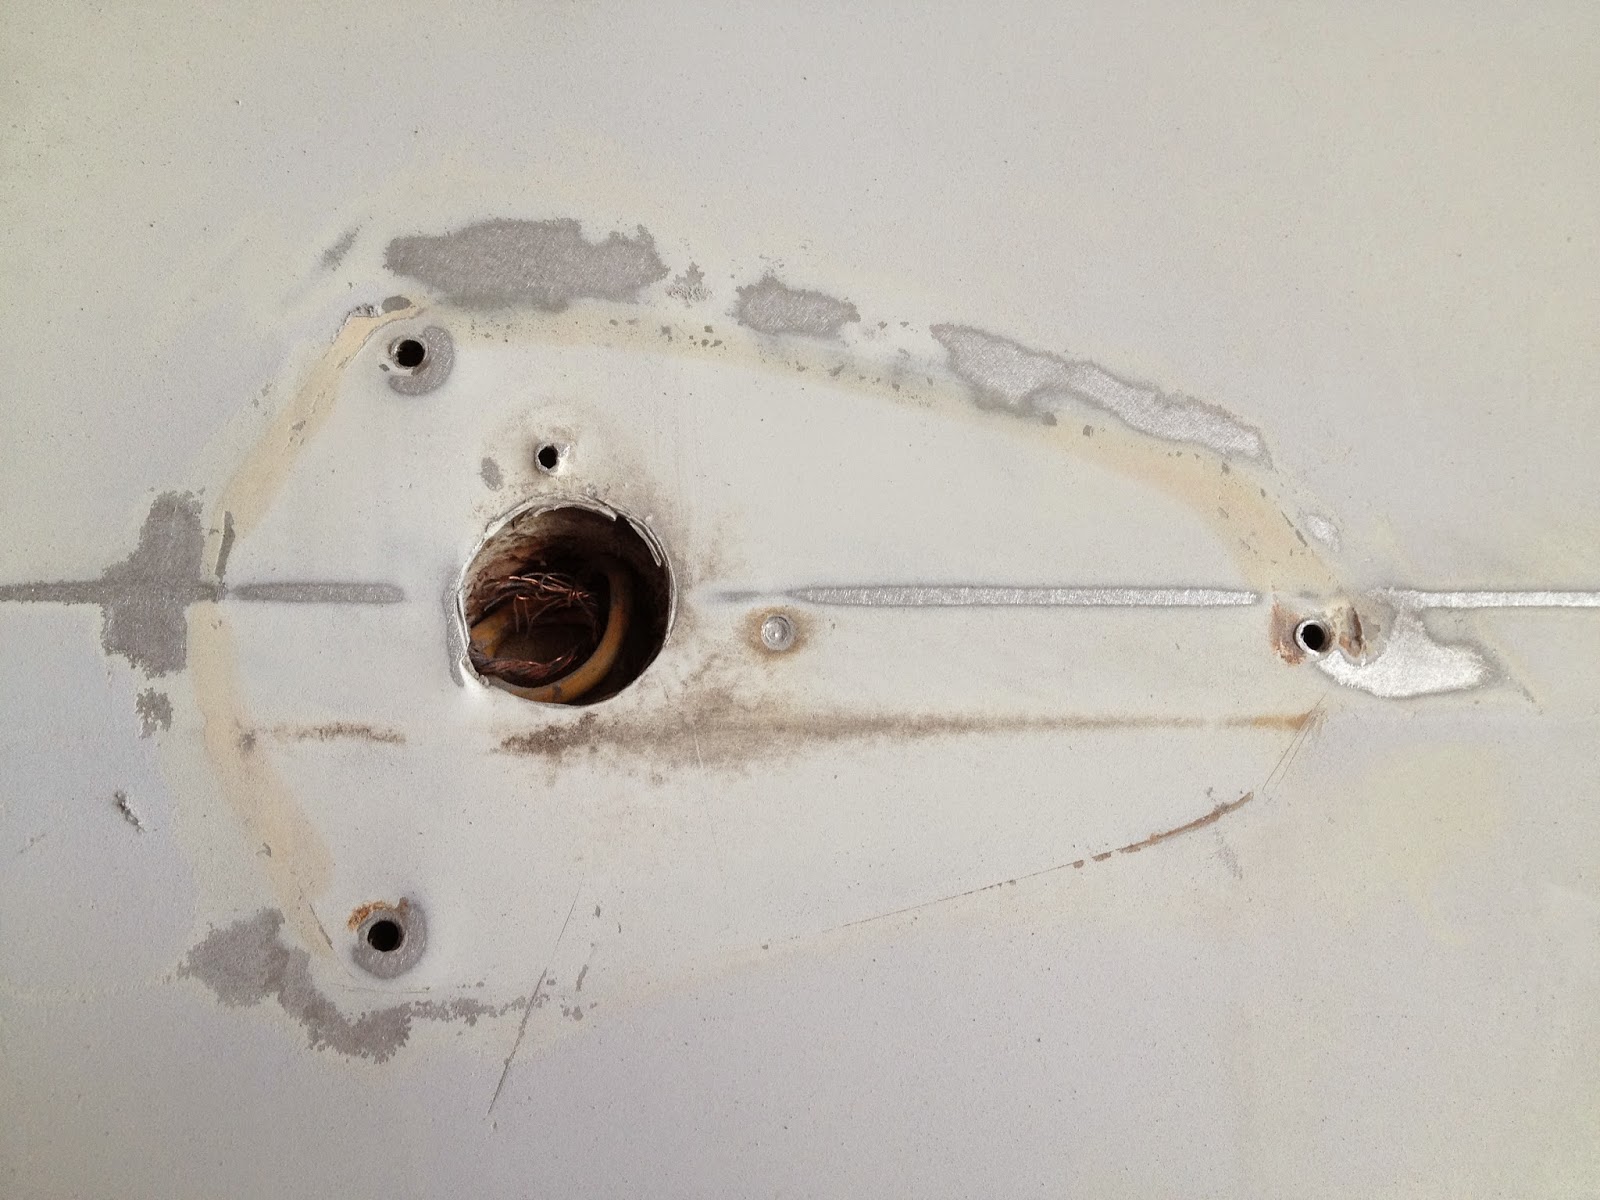
In order for its bulb to light up when you plug in to your tow vehicle, each trailer running light sets over a hole that's been drilled through the skin, for sake of the wiring. The fixture above, from a 1961 Aloha, has been removed during the repainting process; the hole is the size of a dime.


This fixture is on the driver-side rear corner of the trailer in photo 1. A man's finger could easily fit through the hole, and the trailer has12 of these holes for its 12 electric running lights. That's 12 places for water to get in.

The reason this light is pulled away from the trailer is because its protective sealing had dried out from old age, allowing the fixture to come loose. Basically, the trailer had an open wound that would allow water to get in with little trouble.

And the thing to remember about water is….

It always finds a way to run downhill. Which means it'll be behind your trailer's walls in no time.

What to do:

* Get a ladder out and inspect each light, looking for cracks or gaps in the seal between the fixture and the trailer skin. Grab the fixture and try to wiggle it--if it's loose enough to move, it's loose enough for water to get in.

* Check for burned-out bulbs. Plug the trailer into your tow rig, turn the lights on, and make note of any running lights that won't come on. You might as well replace them and make sure a fixture still works, before you reseal something that won't work even with a new bulb.

* If all you find is a minor crack or hole in the seal behind a fixture, a bead of RV sealant, such as TremPro 635, may be all you need.

* Plan to a full reseal job on any fixture that's loose, broken, or with a fully defunct seal.

* You'll need to pull it away from the trailer and clean the trailer surface plus backside of the fixture. (I used brake-cleaning fluid, followed by a wipe of TSP to remove any solvent residue). Apply trailer-seal putty tape to the trailer skin, set the fixture firmly back in place, and trim away excess that's squeezed out. Apply a bead of RV sealant over the top, as extra moisture insurance.

* An RV repair shop can do this for you, of course. But it's not hard to do by yourself, and will help your trailer last for more years to come.