Sunday, February 1, 2015
Common Source of Trailer Leaks: Exterior Running Lights
See those light fixtures at the top edge of this vintage trailer? Those are its running lights--red in back, yellow in front--and they are a commonly overlooked source of leaks.
In fact, if you're experiencing corner or window leaks, there's a good chance that your roof and windows aren't where the water is getting in.
Trailer anatomy lesson:
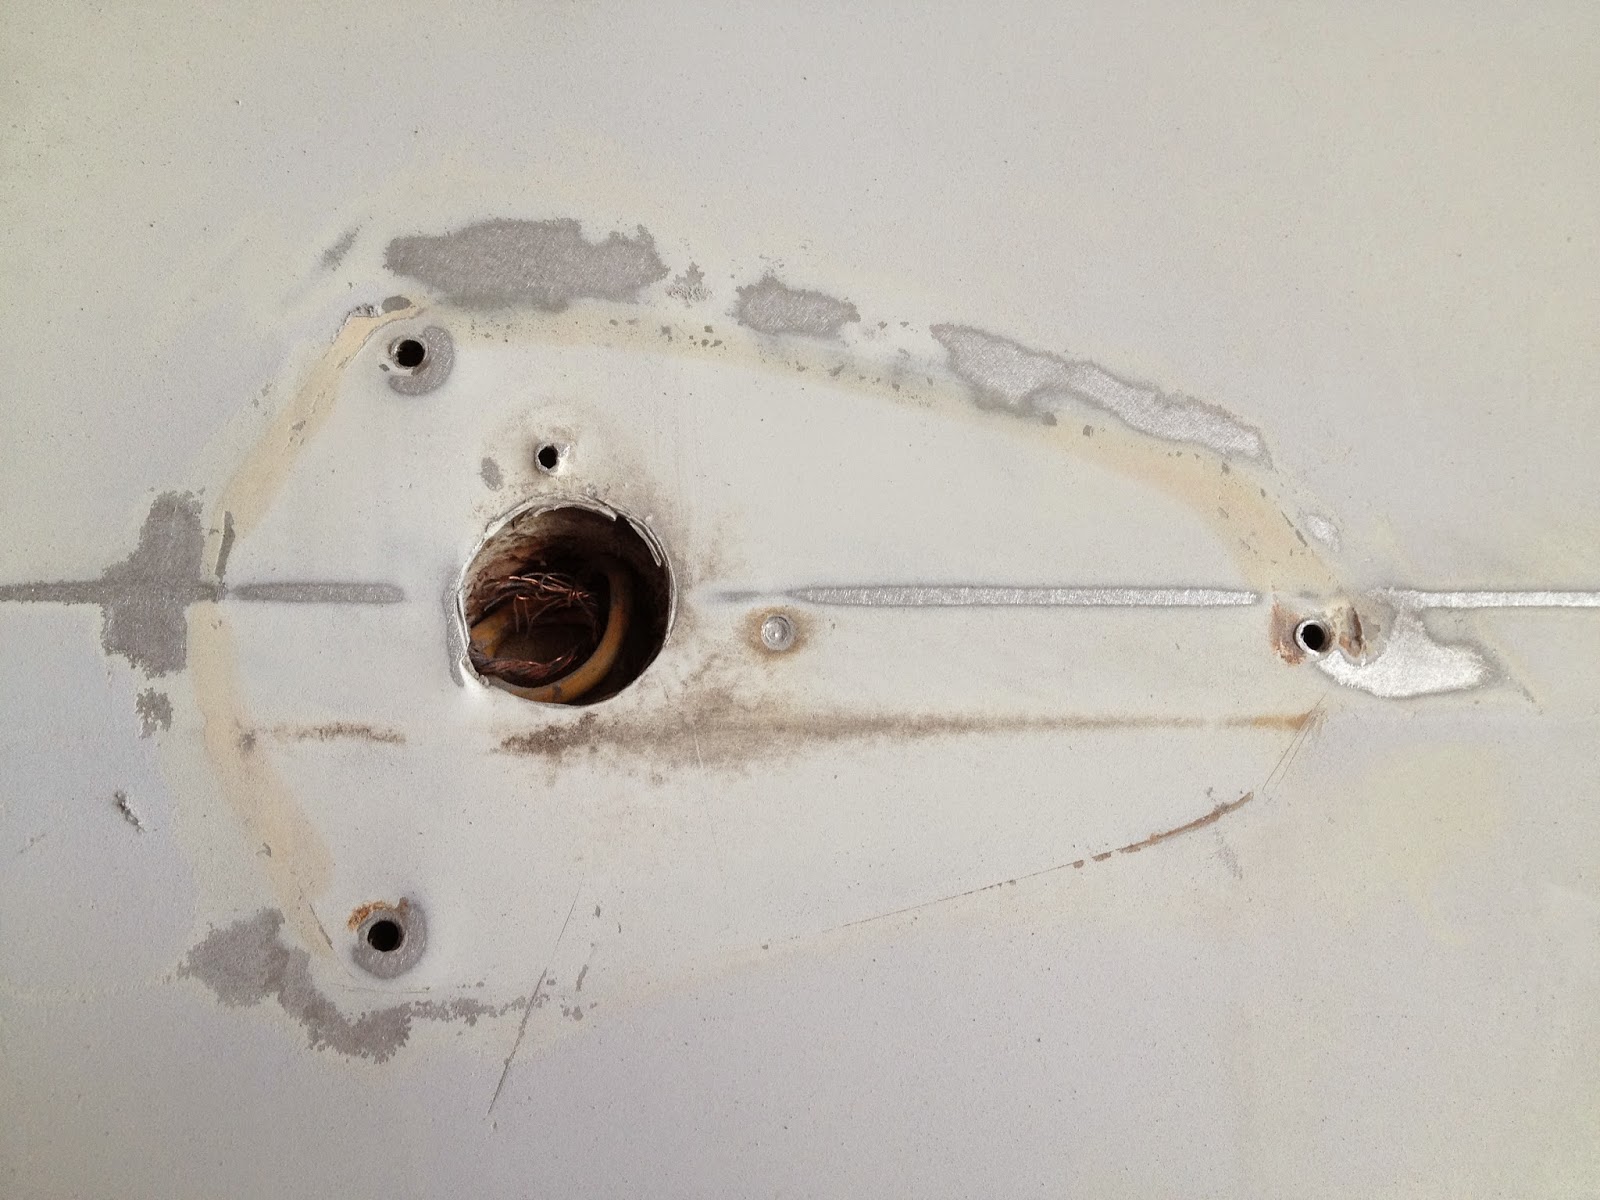
In order for its bulb to light up when you plug in to your tow vehicle, each trailer running light sets over a hole that's been drilled through the skin, for sake of the wiring. The fixture above, from a 1961 Aloha, has been removed during the repainting process; the hole is the size of a dime.
This fixture is on the driver-side rear corner of the trailer in photo 1. A man's finger could easily fit through the hole, and the trailer has12 of these holes for its 12 electric running lights. That's 12 places for water to get in.
The reason this light is pulled away from the trailer is because its protective sealing had dried out from old age, allowing the fixture to come loose. Basically, the trailer had an open wound that would allow water to get in with little trouble.
And the thing to remember about water is….
It always finds a way to run downhill. Which means it'll be behind your trailer's walls in no time.
What to do:
* Get a ladder out and inspect each light, looking for cracks or gaps in the seal between the fixture and the trailer skin. Grab the fixture and try to wiggle it--if it's loose enough to move, it's loose enough for water to get in.
* Check for burned-out bulbs. Plug the trailer into your tow rig, turn the lights on, and make note of any running lights that won't come on. You might as well replace them and make sure a fixture still works, before you reseal something that won't work even with a new bulb.
* If all you find is a minor crack or hole in the seal behind a fixture, a bead of RV sealant, such as TremPro 635, may be all you need.
* Plan to a full reseal job on any fixture that's loose, broken, or with a fully defunct seal.
* You'll need to pull it away from the trailer and clean the trailer surface plus backside of the fixture. (I used brake-cleaning fluid, followed by a wipe of TSP to remove any solvent residue). Apply trailer-seal putty tape to the trailer skin, set the fixture firmly back in place, and trim away excess that's squeezed out. Apply a bead of RV sealant over the top, as extra moisture insurance.
* An RV repair shop can do this for you, of course. But it's not hard to do by yourself, and will help your trailer last for more years to come.
Thursday, October 23, 2014
New Addition: 1965 Chief
I've been into the vintage-trailer hobby long enough to know a good buy when one comes along.
Which explains why I jumped on this 1965 Chief when it came up for sale. The rehab work was already done, and the price was more than reasonable. All I had to do was hook it up, bring it home, and move my own things into it.
The trailer came with a Western theme already started, including tooled-leather fabric on the cabinet doors and chamois-leather used as valances. Seeing as how my blood type is C, for Cowgirl, I knew I would have no trouble furnishing it to my liking.
The Chief's kitchen is in the front. True to the trends of 1965, the appliances are turquoise, and the cabinetry has blond veneer.
There's a nice nook of counter space to the left of the sink. It's just the right size for a small dorm fridge, should I choose to use one. At present, I'm using the space as a bar.
The rear of the trailer features an unusual layout, with a full-length gaucho-bed along the curb wall, and a shorter, kid-length gaucho-bed on the other. Both pull out from the wall. There's plenty of room for my favorite accessory, an electric mini-fireplace heater.
Another element of the unusual layout is the shelving nook in place of an enclosed cabinet. The previous owner trimmed it out with rope, for a nice Western touch.
What used to be a divided utensil drawer above the turquoise icebox has been converted--ingeniously--to a 3-bottle wine rack. The drawer front was removed for the holes to be cut, then trimmed with rope. It was then nailed back over the opening.
The original rear-ceiling light fixture was replaced with this homemade chandelier that uses vintage canning jars as the light globes. 'From something I saw on Pinterest,' I was told. The jars unscrew for safekeeping when the trailer is in transit.
Here's a closeup of the faux-tooled-leather treatment on the cabinet doors. The edges are trimmed with upholstery nails; the tooled-leather fabric is widely available (at Joanne's and WalMart, for instance).
A real chief's name seemed appropriate, so I settled on Crazy Horse.
It's a just-right new home for this crazily painted horse figurine, and my stash of turquoise-feather melamine dinnerware.
Monday, August 4, 2014
Easy Disguise for a Luggable Loo
If you have a camper or trailer without a built-in toilet, you may be familiar with the Luggable Loo. It's a 5-gallon bucket, fitted with a toilet seat and disposable liner, and you use it for those 'discreet personal moments' that sometimes occur in the middle of the night.
Highly practical, inexpensive, but not something you want to look at all the time inside your trailer.
Here's a fast, easy way to disguise it.
Step 1:
Find a vanity stool that will fit over the top of the Loo. I got this one at Ross store for about $12. (I set the bucket and stool up off the floor in order to take a clear picture.)
Step 2:
Slip a short petticoat or slip with elastic waistband over the top of the vanity stool. An XL waistband fits the circumference of the stool well. Secure with a fashion belt that matches your style--you may have one already in your closet, but if not, a thrift-store trip should fix you right up.
Step 3:
PS. The best absorbent material I have found for inside the Loo is to use 2-3 cups of wood stove pellets. (Find them at WalMart, Home Depot, Lowe's, etc.) I buy a 40-lb. bag of these compressed pine pellets for $5; I store it in the garage, and take out as much as I need for each camping trip. I camp often, and a 40-lb. bag lasts 2 or 3 years' worth of camping.
Though designed to be burned, wood stove pellets absorb many times their weight in liquid and give off a nice pine scent. They're also far more economical to use for this purpose than commercial RV absorbents, kitty litter, or disposable diapers.
Highly practical, inexpensive, but not something you want to look at all the time inside your trailer.
Here's a fast, easy way to disguise it.
Step 1:
Find a vanity stool that will fit over the top of the Loo. I got this one at Ross store for about $12. (I set the bucket and stool up off the floor in order to take a clear picture.)
Step 2:
Slip a short petticoat or slip with elastic waistband over the top of the vanity stool. An XL waistband fits the circumference of the stool well. Secure with a fashion belt that matches your style--you may have one already in your closet, but if not, a thrift-store trip should fix you right up.
Step 3:
Place the disguised Loo wherever it needs to be--outside for daytime, perhaps. To use, simply lift the dressed-up stool and set aside. Nobody needs to know what's under it!
PS. The best absorbent material I have found for inside the Loo is to use 2-3 cups of wood stove pellets. (Find them at WalMart, Home Depot, Lowe's, etc.) I buy a 40-lb. bag of these compressed pine pellets for $5; I store it in the garage, and take out as much as I need for each camping trip. I camp often, and a 40-lb. bag lasts 2 or 3 years' worth of camping.
Though designed to be burned, wood stove pellets absorb many times their weight in liquid and give off a nice pine scent. They're also far more economical to use for this purpose than commercial RV absorbents, kitty litter, or disposable diapers.
Friday, August 1, 2014
Girl Camping Girl's Radio Interview
We're on Web radio!
Click this link to hear our interview:
http://webtalkradio.net/internet-talk-radio/2014/07/21/living-with-more-style-than-cash-vintage-trailer-adventures/
Thanks to Ingrid Talpak, host of 'Living With More Style Than Cash,' for looking us up and asking so many good questions about vintage trailers and the passionistas who own and love them. Our favorite subject!
Subscribe to:
Posts (Atom)